
tensorflow freeze_graph.py 工具
简介
最近在研究如何打通tensorflow线下python脚本训练建模,线上生产环境用C++代码直接调用预先训练好的模型完成预测的工作,而不需要用自己写的Inference的函数。因为目前tensorflow提供的C++的API比较少,所以参考了几篇已有的日志,踩了不少坑一并记录下来。写了一个简单的ANN模型对Iris数据集分类的Demo。
梳理过后的流程如下:
- 1. python脚本中定义自己的模型,训练完成后将tensorflow graph定义导出为protobuf的二进制文件或文本文件(一个仅有tensor定义但不包含权重参数的文件);
- 2. python脚本训练过程保存模型参数文件 *.ckpt。
- 3. 调用tensorflow自带的freeze_graph.py 小工具, 输入为格式*.pb或*.pbtxt的protobuf文件和*.ckpt的参数文件,输出为一个新的同时包含图定义和参数的*.pb文件;这个步骤的作用是把checkpoint .ckpt文件中的参数转化为常量const operator后和之前的tensor定义绑定在一起。
- 4. 在C++中新建Session,只需要读取一个绑定后的模型文件.pb, 进行预测,利用Session->Run()获得输出的tensor的值就okay;
- 5. 编译和运行,这时有两个选择:
- a) 一种是在tensorflow源代码的子目录下新建自己项目的目录和代码,然后用bazel来编译成一个很大的100多MB的二进制文件,这个方法的缺点在于无法把预测模块集成在自己的代码系统和编译环境如cmake, bcloud中,迁移性和实用性不强;参考: (https://medium.com/jim-fleming/loading-a-tensorflow-graph-with-the-c-api-4caaff88463f) 如果打不开貌似有中文翻译版的博客
- b) 另一种是自己把tensorflow源代码编译成一个.so文件,然后在自己的C++代码环境中依赖这个文件完成编译。C的API依赖libtensorflow.so,C++的API依赖libtensorflow_cc.so
运行成功后
下面通过具体的例子写了一个简单的ANN预测的demo,应该别的模型也可以参考或者拓展C++代码中的基类。测试环境:MacOS, 需要依赖安装:tensorflow, bazel, protobuf , eigen(一种矩阵运算的库);
配置环境
系统安装 HomeBrew, Bazel, Eigen# Mac下安装包管理工具homebrew ruby -e "$(curl -fsSL https://raw.githubusercontent.com/Homebrew/install/master/install)" # 安装Bazel, Google 的一个编译工具 brew install bazel # 安装Protobuf, 参考 http://blog.csdn.net/wwq_1111/article/details/50215645 git clone https://github.com/google/protobuf.git brew install automake libtool ./autogen.sh ./configure make check make && make install # 安装 Eigen, 用于矩阵运算 brew install eigen下载编译tensorflow源码
# 从github下载tensorflow源代码
git clone --recursive https://github.com/tensorflow/tensorflow

## 进入根目录后编译
# 编译生成.so文件, 编译C++ API的库 (建议)
bazel build //tensorflow:libtensorflow_cc.so

# 也可以选择,编译C API的库
bazel build //tensorflow:libtensorflow.so
在等待30多分钟后, 如果编译成功,在tensorflow根目录下出现 bazel-bin, bazel-genfiles 等文件夹, 按顺序执行以下命令将对应的libtensorflow_cc.so文件和其他文件拷贝进入 /usr/local/lib/ 目录
mkdir /usr/local/include/tf
cp -r bazel-genfiles/ /usr/local/include/tf/
cp -r tensorflow /usr/local/include/tf/
cp -r third_party /usr/local/include/tf/
cp -r bazel-bin/tensorflow/libtensorflow_cc.so /usr/local/lib/
这一步完成后,我们就准备好了libtensorflow_cc.so文件等,后面在自己的C++编译环境和代码目录下编译时链接这些库即可。
1. Python线下定义模型和训练
我们写了一个简单的脚本,来训练一个包含1个隐含层的ANN模型来对Iris数据集分类,模型每层节点数:[5, 64, 3],具体脚本参考项目:
https://github.com/rockingdingo/tensorflow-tutorial 1.1 定义Graph中输入和输出tensor名称为了方便我们在调用C++ API时,能够准确根据Tensor的名称取出对应的结果,在python脚本训练时就要先定义好每个tensor的tensor_name。 如果tensor包含命名空间namespace的如"namespace_A/tensor_A" 需要用完整的名称。(Tips: 对于不清楚tensorname具体是什么的,可以在输出的 .pbtxt文件中找对应的定义); 这个例子中,我们定义以下3个tensor的tensorname:
class TensorNameConfig(object):
    input_tensor = "inputs"
    target_tensor = "target"
    output_tensor = "output_node"
    # To Do
1.2 输出graph的定义文件*.pb和参数文件 *.ckpt
我们要在训练的脚本nn_model.py中加入两处代码:第一处是将tensorflow的graph_def保存成./models/目录下一个文件nn_model.pbtxt, 里面包含有图中各个tensor的定义名称等信息。 第二处是在训练代码中加入保存参数文件的代码,将训练好的ANN模型的权重Weight和Bias同时保存到./ckpt目录下的*.ckpt, *.meta等文件。最后执行 python nn_model.py 就可以完成训练过程
# 保存图模型
tf.train.write_graph(session.graph_def, FLAGS.model_dir, "nn_model.pbtxt", as_text=True)

# 保存 Checkpoint
checkpoint_path = os.path.join(FLAGS.train_dir, "nn_model.ckpt")
model.saver.save(session, checkpoint_path)

# 执行命令完成训练过程
python nn_model.py
1.3 使用freeze_graph.py小工具整合模型freeze_graph
最后利用tensorflow自带的 freeze_graph.py小工具把.ckpt文件中的参数固定在graph内,输出nn_model_frozen.pb
# 运行freeze_graph.py 小工具
# freeze the graph and the weights
python freeze_graph.py --input_graph=../model/nn_model.pbtxt --input_checkpoint=../ckpt/nn_model.ckpt --output_graph=../model/nn_model_frozen.pb --output_node_names=output_node

# 或者执行
sh build.sh

# 成功标志:
# Converted 2 variables to const ops.
# 9 ops in the final graph.
脚本中的参数解释:
- --input_graph: 模型的图的定义文件nn_model.pb (不包含权重);
- --input_checkpoint: 模型的参数文件nn_model.ckpt;
- --output_graph: 绑定后包含参数的图模型文件 nn_model_frozen.pb;
- -- output_node_names: 输出待计算的tensor名字【重要】;
发现tensorflow不同版本下运行freeze_graph.py 脚本时可能遇到的Bug挺多的,列举一下:
# Bug1: google.protobuf.text_format.ParseError: 2:1 : Message type "tensorflow.GraphDef" has no field named "J".
# 原因: tf.train.write_graph(,,as_text=False) 之前写出的模型文件是Binary时,
# 读入文件格式应该对应之前设置参数 python freeze_graph.py [***] --input_binary=true,
# 如果as_text=True则可以忽略,因为默认值 --input_binary=false。
# 参考: https://github.com/tensorflow/tensorflow/issues/5780

# Bug2: Input checkpoint '...' doesn't exist!
# 原因: 可能是命令行用了 --input_checkpoint=data.ckpt ,
# 运行 freeze_graph.py 脚本,要在路径参数前加上 "./" 貌似才能正确识别路径。
# 如文件的路径  --input_checkpoint=data.ckpt  变为 --input_checkpoint=./data.ckpt
# 参考: http://www.it1me.seriousdigitalmedia.com/it-answers?id=42439233&ttl=How+to+use+freeze_graph.py+tool+in+TensorFlow+v1

# Bug3: google.protobuf.text_format.ParseError: 2:1 : Expected identifier or number.
# 原因: --input_checkpoint 需要找到 .ckpt.data-000*** 和 .ckpt.meta等多个文件,
# 因为在 --input_checkpoint 参数只需要添加 ckpt的前缀, 如: nn_model.ckpt,而不是完整的路径nn_model.ckpt.data-000***
# .meta  .index .data  checkpoint 4个文件

# Bug4: # you need to use a different restore operator?
# tensorflow.python.framework.errors_impl.DataLossError: Unable to open table file ./pos.ckpt.data-00000-of-00001: Data loss: not an sstable (bad magic number): perhaps your file is in a different file format and you need to use a different restore operator?
# Saver 保存的文件用格式V2,解决方法更新tensorflow....

# 欢迎补充
最后如果输出如下: Converted variables to const ops. * ops in the final graph 就代表绑定成功了!发现绑定了参数的的.pb文件大小有10多MB。

2. C++API调用模型和编译
在C++预测阶段,我们在工程目录下引用两个tensorflow的头文件:
2.1 C++加载模型#include "tensorflow/core/public/session.h" #include "tensorflow/core/platform/env.h"
在这个例子中我们把C++的API方法都封装在基类里面了。 FeatureAdapterBase 用来处理输入的特征,以及ModelLoaderBase提供统一的模型接口load()和predict()方法。然后可以根据自己的模型可以继承基类实现这两个方法,如本demo中的ann_model_loader.cpp。可以参考下,就不具体介绍了。
a) 新建Session, 从model_path 加载*.pb模型文件,并在Session中创建图。预测的核心代码如下:
// @brief: 从model_path 加载模型,在Session中创建图
// ReadBinaryProto() 函数将model_path的protobuf文件读入一个tensorflow::GraphDef的对象
// session->Create(graphdef) 函数在一个Session下创建了对应的图;

int ANNModelLoader::load(tensorflow::Session* session, const std::string model_path) {
    //Read the pb file into the grapgdef member
    tensorflow::Status status_load = ReadBinaryProto(Env::Default(), model_path, &graphdef);
    if (!status_load.ok()) {
        std::cout << "ERROR: Loading model failed..." << model_path << std::endl;
        std::cout << status_load.ToString() << "
";
        return -1;
    }

    // Add the graph to the session
    tensorflow::Status status_create = session->Create(graphdef);
    if (!status_create.ok()) {
        std::cout << "ERROR: Creating graph in session failed..." << status_create.ToString() << std::endl;
        return -1;
    }
    return 0;
}
b) 预测阶段的函数调用 session->Run(input_feature.input, {output_node}, {}, &outputs);
参数 const FeatureAdapterBase& input_feature, 内部的成员input_feature.input是一个Map型, std::vector
参数 const std::string output_node, 对应的就是在python脚本中定义的输出节点的名称,如"name_scope/output_node"
int ANNModelLoader::predict(tensorflow::Session* session, const FeatureAdapterBase& input_feature,
        const std::string output_node, double* prediction) {
    // The session will initialize the outputs
    std::vector outputs;         //shape  [batch_size]

    // @input: vector >, feed_dict
    // @output_node: std::string, name of the output node op, defined in the protobuf file
    tensorflow::Status status = session->Run(input_feature.input, {output_node}, {}, &outputs);
    if (!status.ok()) {
        std::cout << "ERROR: prediction failed..." << status.ToString() << std::endl;
        return -1;
    }

    // ...
}
2.1 C++编译的方法
记得我们之前预先编译好的libtensorflow_cc.so文件,要成功编译需要链接那个库。 运行下列命令:
# 使用g++
g++ -std=c++11 -o tfcpp_demo
-I/usr/local/include/tf
-I/usr/local/include/eigen3
-g -Wall -D_DEBUG -Wshadow -Wno-sign-compare -w
`pkg-config --cflags --libs protobuf`
-L/usr/local/lib/libtensorflow_cc
-ltensorflow_cc main.cpp ann_model_loader.cpp
参数含义:
- a) -I/usr/local/include/tf # 依赖的include文件
- b) -L/usr/local/lib/libtensorflow_cc # 编译好的libtensorflow_cc.so文件所在的目录
- c) -ltensorflow_cc # .so文件的文件名
为了方便调用,尝试着写了一个Makefile文件,将里面的路径换成自己的,每次直接用make命令执行就好
make
此外,在直接用g++来编译的过程中可能会遇到一些Bug, 现在记录下来
# Bug1: main.cpp:9:10: fatal error: 'tensorflow/core/public/session.h' file not found
# include "tensorflow/core/public/session.h"
# 原因: 这个应该就是编译阶段没有找到之前编译好的tensorflow_cc.so 文件,检查-I和-L的路径参数

# Bug2: fatal error: 'google/protobuf/stubs/common.h' file not found
# 原因:没有成功安装 protobuf文件
# 参考: http://blog.csdn.net/wwq_1111/article/details/50215645

# Bug3: /usr/local/include/tf/third_party/eigen3/unsupported/Eigen/CXX11/Tensor:1:10: fatal error: 'unsupported/Eigen/CXX11/Tensor' file not found
# 原因: 没有安装或找到Eigen的路径
# 参考之前安装Eigen的步骤
3. 运行
最后试着运行一下之前编译好的可执行文件 tfcpp_demo
# 运行可执行文件,输入参数 model_path指向之前的包含参数的模型文件 nn_model_frozen.pb
folder_dir=`pwd`
model_path=${folder_dir}/model/nn_model_frozen.pb
./tfcpp_demo ${model_path}

# 或者直接执行脚本:
sh run.sh
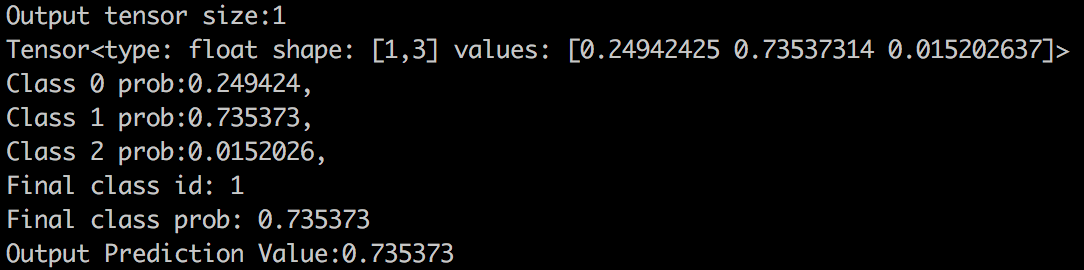
我们试着预测一个样本[1,1,1,1,1],输出该样本对应的分类和概率。进行到这一步,我们终于成功完成了在python中定义模型和训练,然后 在C++生产代码中进行编译和调用的流程。
参考资料和延伸阅读
Comments
-
Thanks for magnificent information I was looking for this info for my mission.
-
I've been surfing online greater than 3 hours nowadays, yet I never discovered any interesting article like yours. It is pretty price enough for me. In my opinion, if all web owners and bloggers made good content material as you probably did, the web can be a lot more useful than ever before.
Reply